Showing posts with label bread. Show all posts

Monday, October 11, 2010

Perfect Fall Bread


This month Canadian TV celebrates 10 years of Food TV. I think that's quite spectacular, considering less and less people are spending time in their kitchens these days. A short news article had a great explanation for this oddity, stating: ingrained in human nature is a need or instinct to gather around food and be with our circle of friends and, of course, family. Since this is happening less and less, we watch more and more Food TV, which tricks the psyche into having such a need fulfilled. Make sense? I think so. Huh.

My husband won't agree with me, but I don't consider myself to be a great cook. I just love to do it, and so I keep on trying. What makes me smile the most though, even more so than cooking a meal for others, is inspiring people to get their own aprons on and kitchens dirty. And to me there is nothing more down to earth than baking amazing bread, filling the house with that unmistakable aroma, and enjoying simplicity at it's finest.

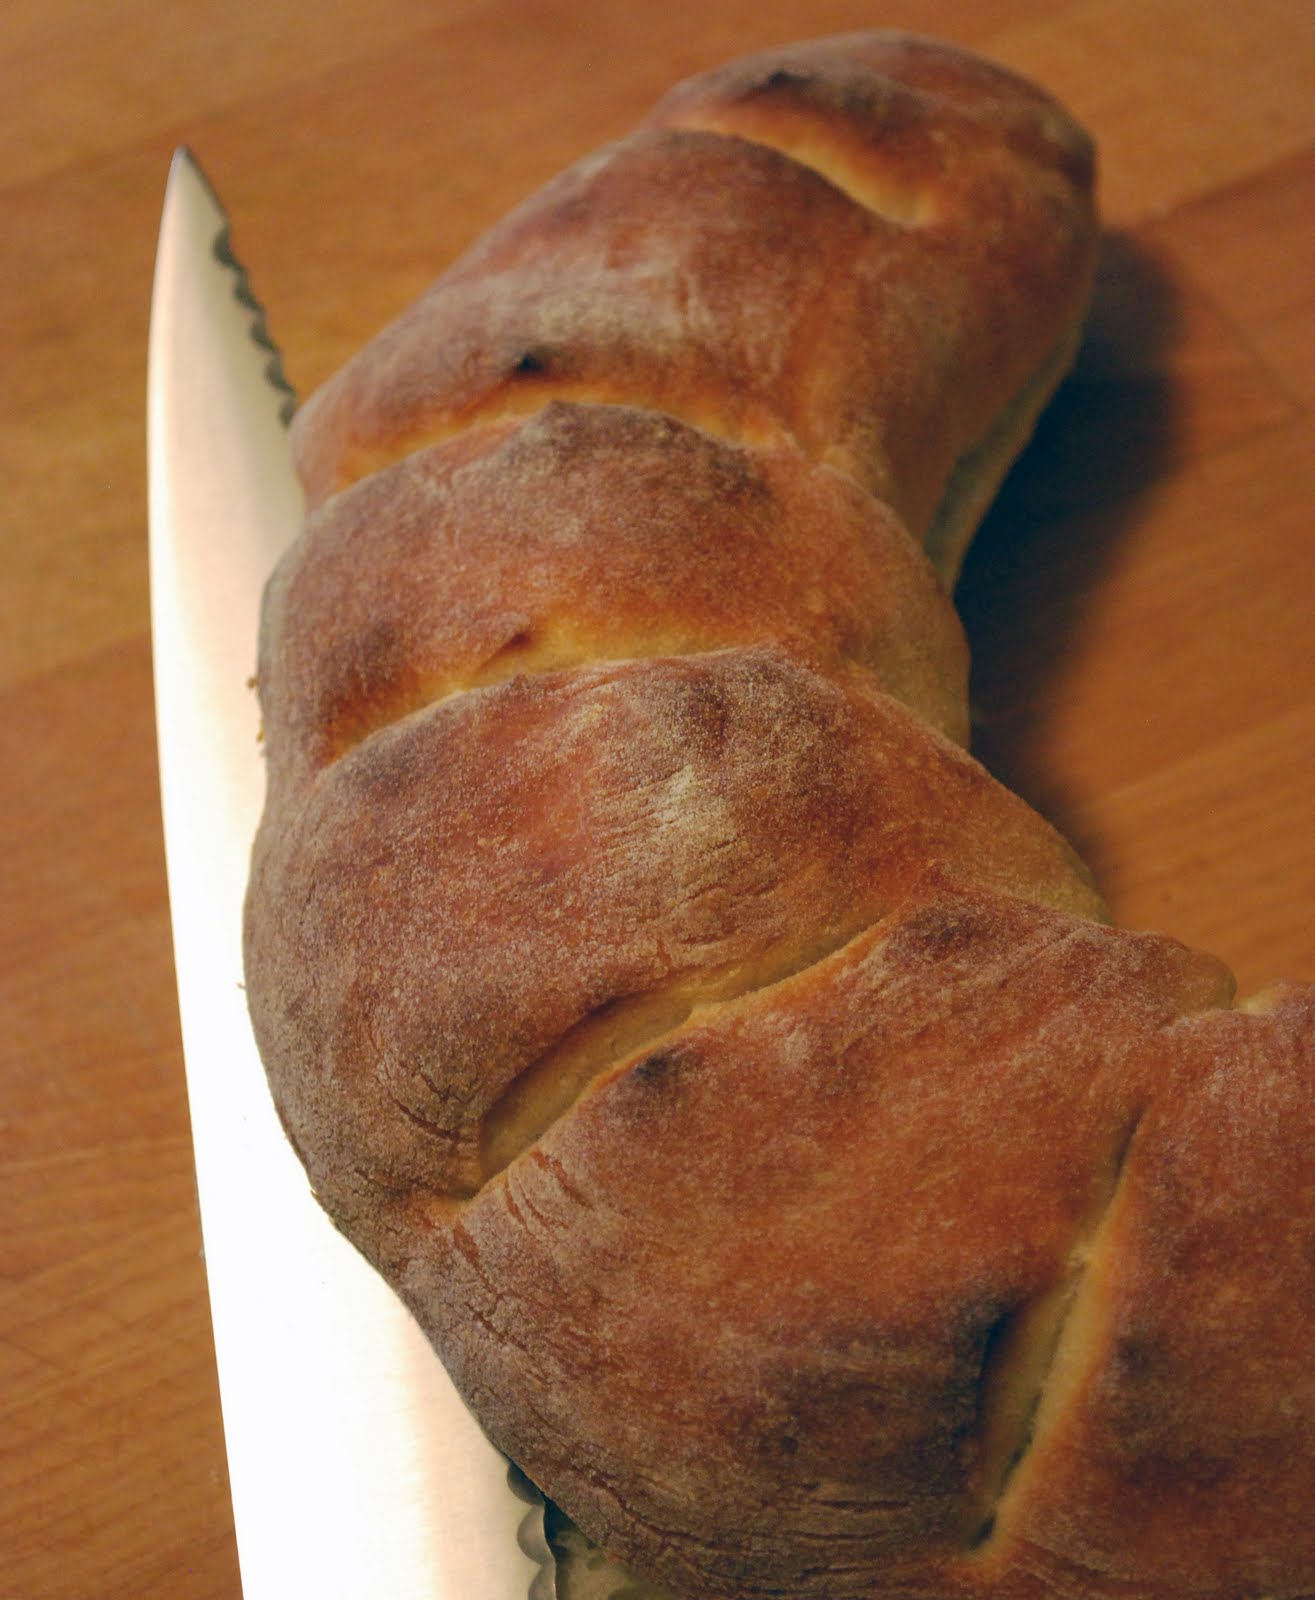
Now don't get me wrong, I watch a ton of Food TV. Learning while watching TV seems more justifiable, right? Anyway, I've been super inspired to take common foods and adding my own twist. So here's a bread I came up with - I think it's perfect for Thanksgiving. The rustic texture plays well with tart Cranberries. And I adore the leaf design, too.


Rustic Rye, Caraway and Cranberry Bread
Makes 2 loaves
2 1/2 cups white bread flour
1 1/2 cups dark rye flour
2 tsp fine grain salt
1 1/2 tsp active dry yeast
12 fluid ounces warm water
1 cup dried cranberries
1 tsp caraway seeds
Dissolve yeast in the warm water, this takes about 10 minutes.
In a large bowl, combine flours with salt. Once the yeast is ready, add the water mixture to the bowl.
Using your hands, combine until it comes together in a ball, then turn out onto counter top and knead for about 10 minutes.
Fold in the cranberries and caraway seeds.
Shape into a ball and place back in the bowl, cover with a lint free dish towel and set in a warm place (24 C) for one hour.
After the first rise, divide the dough into two, and shape each into a ball. Cover with the dishtowel, and rest for 10 minutes.
Now gently shape each into a 20cm (8 inch) log, dust with flour, place on a cookie sheet (with parchment paper) or baking stone, cover with the dishtowel and rise again, for one hour.
Preheat oven to 375 F (180 C).
To make the leaf design, use a sharp knife to gently cut one long slit down the center and about 5 on each side. Do this gently, without deflating the bread.
Bake in the preheat oven for about 35 minutes, or until it sounds hollow when knocking on the bottom of the bread.
If you want a crunchier crust, spray the inside of the oven 2 or 3 times with a water bottle just before placing the bread in it for baking.

Wednesday, September 29, 2010

Bitter Sweet


I dis-like goodbyes. I tend to cry like a baby, my eyes turn red for an hour, and I feel a little empty inside. One of my kids inherited this unavoidable tendency to cry, while my husband and youngest manage to stay composed, since they seem to know that goodbyes are not forever, they are simply see-you-laters. Oh how I've tried to keep my cheeks dry, my eyes white, my dignity in tact. I think cold, heartless thoughts. I pretend we are driving to the zoo, not the airport. I plan for the future, when we'll reunite.

Nothing. Nope, nothing seems to help. On the contrary, holding those crocodiles in just makes them burst like Niagara Falls. So today, when I drop my parents off to catch their plane back to my childhood home, far far away, I am not holding back. I am going to let myself feel what needs to be felt, I am sure it's better that way, anyway.

Saying goodbye to Summer can be bitter sweet, too. At least one thing's guaranteed, it'll be back in about eight or nine months. For kitchen people like me, there is something super special and unique about transitioning from hot days to cool ones, as we continue to enjoy the fruits of Summer's bounty, but crave the comfort of warmed bellies.

So here's a little twist on Zucchini Bread. When I take that first bite, I am reminded of the sweetness of Summer yet enjoy the comfort of Fall, and my tears are no where to be seen.

Spiced Zucchini with Apricot Bread

1/2 cup softened butter
1 cup white sugar
2 large eggs
1 1/2 tsp real vanilla extract
1 cup shredded zucchini
3/4 cup diced, dried apricots
1/4 tsp salt
1/2 tsp baking soda
1/4 tsp baking powder
1 tsp cinnamon
1/4 tsp nutmeg
1/4 ground cloves
1 cup all purpose flour
1/2 cup whole wheat flour

Preheat oven to 350 F.
Combine butter and sugar in a large bowl. Whisk for a minute or two, then add the vanilla and eggs. Stir in zucchini and apricots.
In a separate bowl, sift together salt, baking soda, baking powder, spices and flour.
Using a small spatula, pour the dry ingredients into the large bowl, then gently stir only just until combined. The more you stir, the denser the bread becomes.
Grease a loaf pan, fill with batter.
Bake in the 350 F oven for one hour.

Monday, August 23, 2010

Sometimes I crack myself up. But only sometimes.


My kitchen's a mess from cooking all day. I'm wearing my favourite blue jeans. The Summer air is crisp, and I've baked bread today. This home cook is as happy as can be! Certainly it's not just me who gets excited about these things?

When asked which season I enjoy the most, I never quite get my answer right. Is it Summer? I suppose it was, as a child, since school was out and we lived in our bathing suits. Or is it Spring? Where everything dead comes alive, and those first Spring flowers bloom in full color. Or perhaps Fall...

Today I will answer, because today I can!
My most favourite Season is no season at all...
I'm lucky as can be, it comes four times a year.
It's the change of Season I love.
Especially when celebrated with a beer.


All right, so I am not much of a poet! But who says I can't try?


Pimped up Garlic Bread
Serves 6

1 large loaf Italian style bread (or homemade french bread, shaped as a letter, like mine today - these things happen when one loves to cook), halved lengthwise
8 - 10 garlic cloves, uniform size, skins left on
6 tbsp unsalted Butter, softened
2 tbsp finely grated fresh Parmesan
1/2 tsp salt
ground black pepper
1 tbsp each fresh basil and chives, finely chopped
1/2 tbsp each fresh thyme and oregano, freshly chopped


Preheat oven to 500 F.
Toast garlic cloves in a dry skillet, shaking pan occasionally, until fragrant and color of cloves deepens slightly, about 8 minutes. Remove from skillet. When cool enough to handle, peel and mince the garlic.
Using a dinner fork, mash garlic and remaining ingredients into butter until thoroughly combined.
Spread cut sides of loaf evenly with garlic butter, transfer to cookie sheet and bake on middle oven rack for 5 - 8 minutes, until golden brown and toasted. Cut each into 2 inch slices, serve immediately.


Tuesday, July 20, 2010

Beefy, sloppy, goooooood


If you are on a diet, I strongly suggest you do not read on. Go to your favourites and find a different site. Don't think about juicy, tasty food. Or better yet, turn off your computer. It's for your own good. Now, for the rest of us that have noticed eating home made food, which is not always low in fat, carbs, or whatever the latest trend might be, is oddly enough healthier and lower in calories, chemicals, and sweat due to teenage "cooks" preparing our take out... drool on, um, I mean, stay with me.


Hi! I'm glad you're still here. Since I am about to share with you this yummy in your tummy, super fast, husband pleasing meaty sandwich you're sure to make again and again.


For an added bonus, I've got a beer pairing tip: Rickard's Dark ale is rich, satisfying and perfect with zippy beef and onions. I've only recently discovered the vast world, or dare I say culture, of beer pairing. Until now I left that to wine and somewhat sophisticated dinners. I have news! Beer is not just a drinkers brew, for unruly college students or folks living a few miles outside of the nearest town. It's all grown up, just like you and me.


Caramelized Onion and Beef Sloppy Sandwich
Inspired by Ree Drummond

2 medium white onions
1 tbsp brown sugar
hot sauce, to taste
1 1/2 pounds lean ground beef
fresh ground pepper
salt, to taste
1/2 tbsp thyme
1/2 cup Worcestershire sauce
4 whole sausage buns
mozzarella cheese
butter

Peel, halve and slice onions. Heat a saute pan to medium-high heat, add about 2 tbsp butter, then onions, brown sugar and a few splashes of hot sauce. Cook onions are soft, about 5 - 7 minutes.
Remove onions, and set aside.
Season ground beef with salt, pepper and thyme.
Add 2 tbsp butter to saute pan from which onions were removed. Heat until lightly browned, then cook beef in the butter until about half done. Don't stir much, the more you stir, the tougher the meat gets. At the half way point, add Worcestershire sauce and about 5 splashes of hot sauce. Cook until evenly browned throughout.
Add onions and yet another 2 tbsp butter to the pan, stir to combine. Remove from heat.
Turn the oven to broil.
Butter halved sausage buns and lay flat on a cookie sheet.
Broil until toasted, about 2 - 4 minutes. Watch carefully to avoid burning.
Remove from oven and divide meat and onions between the buns. Top with slices of mozzarella.
Return to oven. Heat until cheese is melted, about 3 minutes. Remove from oven, close sandwiches and enjoy!


Wednesday, May 26, 2010

Hooray, hooray, I love the month of May!


The month of May seems like a good time to talk about favourites, since May happens to be, hands down, my favourite month of the year. The grass and trees are green, the temperature divine, days last long(er) into the night - oh why can't it be May all year long?

During the past months of bread baking by hand, I have also discovered that my favourite bread is a baguette style multi grain loaf. It's so very simple, not at all perfect in shape, as I can't seem to master the transition from cookie sheet to hot baking stone in the oven quite right. It is not in the least sweet, crispy on the outside, soft on the inside, with white flour and a good variety of grains coexisting in perfect harmony. (I use Robin Hood Multi Grain Bread Flour.) I love that I can whip up fancy crostini toppings and toast this bread, sliced, in yummy olive oil. At the same time, I can cut 6 inch chunks, and make sub sandwiches for school lunches. And who can resist a little peanut butter and Nutella smothered in between two fresh slices? I certainly can't...

Multi Grain Baguette

2 1/2 cups white bread Flour
1 1/2 cups multi grain bread flour
2 tsp salt
1 1/2 tsp active dry yeast
12 fl oz warm water

First, start by stirring the yeast into the warm water. Allow yeast to froth up, about 10 minutes.
Combine flours with the salt, and once the yeast is ready, combine both and, using your fingers, work together into a tacky ball. The dough should not be too sticky, just a bit.
Place dough on your counter top, knead for 8 - 10 minutes.
Place in a bowl, cover with a tea towel and set in a draft free, warm place (24 C) for 1 hour, or until doubled in volume.
Divide the dough in half. Flatten each portion slightly with your palm, then fold in one side to the middle, then the next. Roll up horizontally to make a baguette. You can make 2 - 12 inch baguettes, or 4 - 6 inch.
Place the baguettes on a tea towel which has been lightly dusted with flour. Make sure they are spaced far enough apart so they can double in size without touching. Cover with second towel.
Rise until doubled in size, about 1 hour.
Preheat the oven to 475 F with your baking stone inside.
Scour the bread tops with your sharpest knife, preferably one with a smooth edge, to avoid pulling the dough.
Using a pizza paddle or a cookie sheet dusted with flour, slide the baguettes onto the hot baking stone in the oven. Spray the inside of the oven a few times with a water spray bottle, and quickly close the oven. (This creates that lovely crunchy crust.) Avoid opening the oven for at least 5 minutes.
Bake for 10 - 15 minutes.
Remove bread from the oven, knock on the bottoms - if it sounds hallow, the bread is ready.


Saturday, May 1, 2010

Mushrooms and a little bread


There's no doubt about it - weeknight meals need to be made in a flash. Being a stay-at-home mom, however, not only is my world quite different from working moms, but so is my weeknight cooking. I can enjoy the luxury of spending 4 hours on a meal, if I so desire. Did I mention I love being a stay-at-home mom? Sure, there are sacrifices to be made. But so far I don't seem to be missing anything, so at home I will stay. It's the weekends which seem to require quick meals. Yet another luxury we enjoy is a husband, or daddy, who has every weekend off. We don't get much time with him during the week, but Saturday and Sunday is family time (when, of course, there isn't something in need of fixing in our semi-old home). We spent most of the day out, and when late afternoon rolled around, the inevitable question loomed: what should we make for dinner? To which hubby replies, let's order pizza! (GASP) Order pizza?! Not when there is fresh sage and thyme in the fridge, not to mention delicious mushrooms, mixed greens and homemade bread!


Dinner in 15 minutes:
Grab 2- 3 cups of mushrooms, wipe them with a damp cloth. Go to town and tear them up a little, no need to chop! Heat a large skillet on high, swirl in some olive oil. Add the mushrooms, cook for 2 - 3 minutes. Now grab a few red chili flakes, a sliced clove of garlic, a couple of sprigs fresh thyme and a handful fresh sage leaves. Salt, pepper, a knob of butter. Oh, yum! Slide the mushrooms into a bowl, add some more olive oil to the hot skillet. Plenty would be great. Slice up baguette style bread, place in the skillet. Flip after a couple of minutes, then toss shredded Jack cheese on the slices. Remove from pan when cheese has melted. Now to the completion of this meal: Half a cup of plain yogurt, a good swirl of olive oil, a couple of teaspoons cider vinegar, salt, pepper and a crushed clove of garlic = healthy, creamy, low sodium, no ingredients we can't pronounce salad dressing. Slice some tomatoes, add to mixed baby greens. Toss with a little, or a lot if you like - it's healthy after all - salad dressing. Oh, and there's always the option of delegating a significant other a couple of steaks which have been sprinkled with salt and fresh pepper, and sending him/her out for a visit with the barbecue.
Kraft dinner, what? Pizza, huh?! I bet I can make this meal faster than anyone can order and bring home pizza. Or cook out of a box.

Thursday, March 25, 2010

Hot Cross... Buns?


It's about time we take old fashioned Hot Cross Buns and gave them a modern touch. Who's with me on this one? With Easter celebrations just around the corner, I have put a little thought into Easter Morning breakfast. This year I finally added super cute pastel coloured egg cups to my dinnerware collection, and am hoping for a bright, sunny morning on April 4th, 2010. But what is Easter breakfast? I have never, ever spent a minute of my life thinking about it... for some reason or another it just didn't hold any value. But now I picture children and adults gathered around a big table, (which may even flaunt a table cloth - something new to me and my woes of ironing!), I imagine it to have a tight gingham pattern, and a pot with tulips right in the center. We'd munch on Hot Cross monkey'fied Bread, drink freshly squeezed juice along side strong, black coffee and enjoy a feast of Potato Pancakes topped with Smoked Salmon, Poached Eggs and fresh Chives. Perhaps Broiled Grapefruit on the side? Now doesn't that sound like a bright and sunny way to say good-bye to old man Winter and hello to the warm seasons, on top of what Easter really is about, of course - a hope for our future, and a guarantee of Eternal Life!


I came up with this recipe after reading many original recipes. They were all similar, and yet had some interesting differences. I have decided to only use Raisins in my version - as I am not sure there are many candied fruit lovers left on the planet. (But I would love to hear from you if you are!) The assembly for this bread is derived from Monkey Bread, which has been around forever as well, I am sure, but the excitement of pulling off a chunk of warm Bread with sticky drizzle still holds true to today's modern culinary world, I think!

If you don't have an angel food cake pan, a Bundt pan will do.

Hot Cross Monkey'fied Bread
Serves plenty

3 tsp active dry yeast
1/2 cup warm water
1 cup warm milk
1/2 cup softened butter
1/2 cup white sugar
1/2 tsp salt
3 large eggs
1 1/2 tsp real vanilla extract
5 cups all purpose flour
1 1/2 tsp cinnamon
1/2 tsp nutmeg
a pinch or two of ground cloves - feel free to add more of each of these, as you prefer!
3/4 cup raisins

Monkey:
1/4 cup melted butter
3/4 cup packed brown sugar

Glaze:
1 cup icing sugar
2 -3 tsp milk

To make your dough, add the yeast to the warm water and allow to dissolve and froth up, about 10 minutes.
Meanwhile, combine the flour, sugar, salt and spices. When the yeast has dissolved, add to the flour along with the milk, butter, eggs and vanilla. Mix in the bowl (with your hands!) for about 2 - 3 minutes. Turn out onto a lightly floured surface and knead for 5 - 7 minutes. The dough should be quite soft, but if it's overly sticky, add another 1/2 cup of flour during the first couple minutes of kneading only.
Place the dough in a bowl, cover with a lint free towel, and set in a warm draft free place for 1 hour. (I like to preheat my oven for 30 Seconds, then turn it off, and place the bowl in the oven with the door shut.)
After the first rise, turn out the dough onto your work surface, dump the raisins on it and knead them into the dough very gently and only for a few seconds. Divide the dough in half, and roll into 40cm logs. Cut these into 3 - 5cm pieces, which you then gently roll into balls.
Grease an angel food cake pan with butter. Set out a bowl with the melted 1/4 cup butter and another with the 3/4 cup brown sugar. Dip each roll of dough in the butter (dip, don't soak or you will run out of butter!) to cover, then dip in the brown sugar. Place it in the prepared baking pan. Repeat until all the dough is used up. Make sure the balls are placed evenly in the pan.
Cover again with a lint free towel and allow to double in bulk, about 1 hour.
Preheat oven to 350 F. Bake the Hot Cross Bread for 40 minutes. If your angel food cake pan is a two piece model, like mine, you will want to set it on a rimmed cookie sheet otherwise there will be a burnt puddle of butter and sugar on the bottom of your oven!
When baked, place the bread in the baking pan on a cooling rack for 10 minutes.
Remove the bread from the pan, but do not turn upside down.
Whisk together the icing sugar and milk, and drizzle over warm bread.

Enjoy!


Friday, February 19, 2010

Tears of joy?


I caught myself almost shedding a tear today as I kneaded some basic white dough. Perhaps this has gone a little too far, this peace and joy I feel while making bread?! I encourage everyone to get their hands in some dough and see it from beginning to end... it's a beautiful thing (figuratively and literally).

Bread making is largely something done by feel, one can have estimated times for kneading, rising and all these other things, but temperature, types of flour and so on change these factors from bread to bread. Today I decided to take it to the next level and allow my baking stone to heat up in the oven, then slide the shaped dough onto it once the oven is good and hot. Bread making can seem overwhelming at first, but after having done it so many times, little steps like these are no big deal. It reminds me a little of when I learned how to drive a car. Here in Canada we have the choice to learn on automatic or standard - I chose standard since my roots are German and it is a shame for a German not to drive stick, let me tell you! But while driving such a car, there is a lot to do at once, we must shift gears, watch the road, stop at stop signs and avoid running over pedestrians. I focused on shifting first - and ran through a few stop signs! In bread making, shifting gears is a little like figuring out how the flour comes together with the water, yeast and anything else it may need. Once this is perfected, we can add some extra steps, a stop sign may be likened to a hot baking stone in the oven, or giving the dough a particular shape.
I made Fougasse today. I think it's french. But I could be entirely mistaken. Regardless, it's a baguette style dough, just flour, salt, water and yeast. I love to tear into bread at dinner time, don't you? Crusty on the outside, fluffy on the inside... So fresh, so very handmade, so .... cheap to prepare! It cost me under a dollar to make 6 large Fougasse - and I probably would have spent at least $5 at a bakery. But, really, it's certainly not about the money here, but rather the process that goes into it and the reward at the end when you get to enjoy.
What's the next step? Figuring out how to time my baking right in order to bring friends warm bread more often than now. It's just all that better when shared!
I have no recipe for you today, rather an invitation of bread making together, as I strongly believe in the sharing of knowledge. It can be a 3 hour process, but time flies when you are having fun...

Wednesday, February 10, 2010

Love redefined


I am sure you have noticed the lack of beef dishes on my blog. But also the promise of a 'meaty future' to my husband (and a 7 year old daughter who has inherited his steak loving gene). Just as with baking, I find it difficult to put love into preparing beef. I love certain cuts, but they happen to also carry a big price tag: Filet Mignon, or a roast tenderloin, is what I can honestly say I enjoy. New York strip being a close second when barbecued, but other than that I love my veggies and, of course, bread - but especially veggies drenched in olive oil that then soak into fresh bread. Add some fresh herbs and I am a happy lady!


Yesterday I set out to take a less expensive Round Roast (cut from the leg, so it's a tougher cut, but with the right technique - braising - it does get quite tender), in hope of turning it into something spectacular. I carefully sweated out my flavour base: a trio of onion, carrot and celery. Then lovingly added fresh rosemary, sage and bay leaves plus a good amount of garlic. The beef was seared, which doesn't necessarily keep in the juices but does add an element of flavour to the dish. Everything was then topped with some stock and left alone to simmer for a good hour. Sounds yummy! But I just couldn't get in the mood... After an hour or so, I removed the beef, reduced the braising liquid, added a splash of lime and fresh black pepper. Still nothing...


Let's just say my husband gets to eat a bunch of beef over the next few days! I did eat a little - it was very tender, full of flavour. So I would say it IS possible to take a cheap cut of beef and make into something great. For those of us on a budget (and who isn't), this can be great news! But it looks as though this is not a place I personally can cut costs, and that's OK. I am OK with beef just once or twice a month.


So if you are reading this, and following my recipes, be prepared to get depth of flavour, sometimes crisp and fresh, other times robust - out of the ground, off of trees and snipped from an herb garden. That's where the love is! And should I invite you over for lunch some day, you may find yourself eating Bruschetta and Guacamole, with home made crispy bread and pita, of course!

Tomato Bruschetta with Basil

6 ripe tomatoes
fine sea salt
1 clove of garlic, make sure to remove any green from the middle of the clove
1/4 cup olive oil
pinch of cayenne
handful of fresh basil leaves

crusty bread, sliced 1/2 inch thick, about 3 inches in width
olive oil
a few cloves of garlic, halved

Dice the tomatoes into 1cm pieces. Place in a fine mesh sieve over a bowl or the sink. Sprinkle with a generous amount of salt (about 2 tablespoons) and allow the salt to pull the water out of tomatoes for about 10 minutes.
Meanwhile, mash a clove of garlic into a paste, either with a mortar and pestle or the side of a knife on a cutting board.
In a medium size bowl, combine the garlic, cayenne, olive oil and a handful of roughly chopped basil. When the tomatoes have drained, add them as well. Stir to combine.
Heat up a saute pan to medium high heat, add a good splash of olive oil. Crisp the bread slices on both sides.
Remove bread from the heat and immediately rub them with garlic.
Place a basil leaf on the bread, plus a heaping spoon of the tomatoes, and enjoy!

Add a thin slice of fresh mozzarella on top of the basil leaf to change it up once in a while! YUM.

Tuesday, January 26, 2010

Baking, not my strength

I (kinda) love to bake. But baking does not love me. I am wondering if it could be that I don't enjoy the process as much as cooking, possibly because my sense of smell is not put into action until the aromas come pouring out of the oven, and I so in turn do not put as much love into what I am doing. Maybe it's because I know I can only eat a small portion of what I am making, not a full plate of it as when I am preparing dinner. But nevertheless, I do try hard not to buy much prepackaged, as I can not get past those long lists of ingredients, with words I would need to google to ever understand.
However, today my fridge is horribly empty and I am trying to hold out on grocery shopping until the weekend. So I pulled myself together and made Cinnamon Buns - not something for the every day, but certainly something I enjoy the end result of! I tried a different recipe, but it didn't bring the best results. I am quite sure this is due to my baking talents, not the recipe, as it is by Williams-Sonoma.
What I wanted to write about today is that I have discovered something that could enhance special breakfasts, such as Christmas, New Years or perhaps a birthday. You may know this already, but I had no clue: The day before a big breakfast, make up your sweet dough for the buns, then - after the dough has risen, punch it down, load it up with brown sugar, butter and cinnamon, then roll up and slice into individual cinnamon buns. Place them in your baking pan, then double wrap with plastic wrap, and refrigerate for 2 - 24 hours. Now doesn't that open up possibilities! Just place at room temperature for 30 minutes before baking, and there you have it, fresh, warm cinnamon buns perfectly timed for that special day!


ALSO, for an extra kick of shine and a gorgeous golden hue, brush the cinnamon buns immediately before and after baking with a little milk or half-and-half. You may not even feel the need for icing after this..


Saturday, December 26, 2009

Exciting drop biscuit update!

It's been a truly wonderful Christmas this year, as it is every year, but this one just felt a little *extra* special. I have to brag and say that our dinner was stunning - Beef Tenderloin, stuffed Mushrooms, Asiago Risotto, Caesar Salad and the biscuits you see above. I wanted to relieve my mother in law of all the work that goes into a traditional turkey dinner, and allow her to sit back and enjoy the festivities. This also gave me the chance to change things up a little, as I tend to do, and I decided on a festive, but definitely not traditional meal. Originally, I meant to make a puff pastry type bread stick, to replace the dinner roll, but I was a little over ambitious and so decided to fall back on a trusty staple - my drop biscuit recipe. I did, however, use the filling for the puff pastry recipe in the biscuits. Where I would normally go for a sharp cheese and herb I instead turned them into Sundried Tomato and Basil Biscuits. Now for anyone who loves sundried tomatoes as much as I do, I just know this is as exciting to you as it was to me. Sun soaked tomatoes baked right into a fluffy biscuit and hit with some basil is a simple pleasure I will forever enjoy.

Here's the basic biscuit recipe:

Drop Biscuits
Makes 12 biscuits

2 cups all-purpose flour
1 tbsp baking powder
1/2 tsp salt
1/4 cup butter, softened
1 cup milk

Preheat oven to 450 F (230 C). Prepare pizza stone or baking sheet.
In a bowl, combine flour, baking powder and salt. Cut in the butter. Add the milk and flavourings and mix only until the dry mixture has been absorbed.
Drop by heaping spoonfuls (12 even portions) onto a pizza stone.
Bake for 12 - 1 5 minutes, until golden brown

For the Sundried Tomato and Basil version you need:

1 small garlic clove, peeled
6 oil packed sundried tomatoes, drained
1/2 cup coarsely chopped fresh basil (or if you are whipping these up spur of the moment, and aren't well stocked with fresh herbs, use 1 tsp dried basil)
1 tbsp olive oil
1/2 tsp kosher salt
optional - 1/2 cup freshly grated Parmesan, which the biscuits in the photo do not have, as there was plenty of cheese in the meal already, but I am pretty sure it would be a beautiful addition

Puree garlic clove in food processor, then add sundried tomatoes, basil, oil and salt. Sitr into biscuit dough.
Fold in the cheese, if using.
Bake as in basic biscuit directions.