Showing posts with label cheese. Show all posts

Wednesday, August 4, 2010

Yes, Sir!


When Bobby Flay talks Burgers, we listen. We do as he says. And we throw out our idea of what a good homemade burger patty should be. What I am talking about is all that extra stuff we mix and over mix into our ground chuck to"hold everything together and build flavour". Things like eggs, breadcrumbs and onions. Forget them, leave them behind. It's about to get much simpler. And oh so much tastier.


Since burgers a la Bobby is a super fast operation, you'll want to heat the BBQ to high before getting to the meat so it's good and ready when you are.

If your ground beef is packaged like mine, it will look a little like a flat, rectangle brick. Using a knife, cut/divide this meat into four even portions, right there, in the package (after removing any wrapping, of course). Gently shape each portion into a 3/4 inch thick patty. Do not overwork the meat, don't squeeze it, don't compress more than you need to. Nobody likes a dry burger. Now make an impression in the middle of each patty. This prevents it from puffing up and looking more like a flying saucer than a burger.

The patties are just about done - a little seasoning of coarse kosher salt and freshly ground black pepper on all sides, plus a little swipe of grape seed oil over everything, and we are ready for the BBQ.

Gently place the patties onto the grill, cook for about 5 minutes on each side for well done. Flip once only half way through, and never ever press down on them. Nobody likes a dry burger. At roughly minute number 9, place cheese of your choice on the patties, and close the BBQ for just a quick minute to melt it. I like to toast the buns at the same time I am melting cheese. After about a minute, remove the buns, place your patties on the bun bottoms and slather with toppings. This is where you want to build flavour. Think outside the patty, not in.

For this Cheyenne Burger I used Old Cheddar, Barbecue sauce, French Fried Onions and fresh chopped Parsley.

Now that's what I call a good burger.

By the way, I've made a rather interesting discovery: Grass-fed organic ground beef hardly shrinks during the cooking process. Meaning you'll have more on your plate, and less in the barbecue drip pan. Besides, it's so much better for you, and the animal.


Saturday, July 31, 2010

What, it's dinner time again?!

Um, good-bye July? Seriously?

I won't say it, I promise...

...OK, so maybe I will. Time flies. There, I said it. It's annoying, I know, everyone says it, too much. But for some reason Summer seems to be winding down, and this brings with it the likeness of a close friends' good-bye. Sure, if we use our time wisely, and fill it with great things, however small they may be, I think we live as though on a surf board, gliding through life with it's ups and downs at a tremendous speed, never stopping to look back with regret. Summer always goes by too fast, which is why I might slap you if I ever catch you complaining about it being too hot. Since now you see it, then suddenly, you don't. Of course, it's rather comforting to know Fall is next in line, like a big warm chunky knit blanket wrapped around us, telling us, don't worry - Summer will be back in a few months.

We didn't have much planned this season, there's family in town, friends to catch up with and our kids needed to be given the time and motivation to finally master swimming and riding their bikes. Those were our goals for this year, may I say simple, yet I love the idea of slowing down and taking time for small details as though they were hugely important to the overall scheme of life. And I suppose they are.


And as time flies by, so does dinner time. Here's one of my favourites:

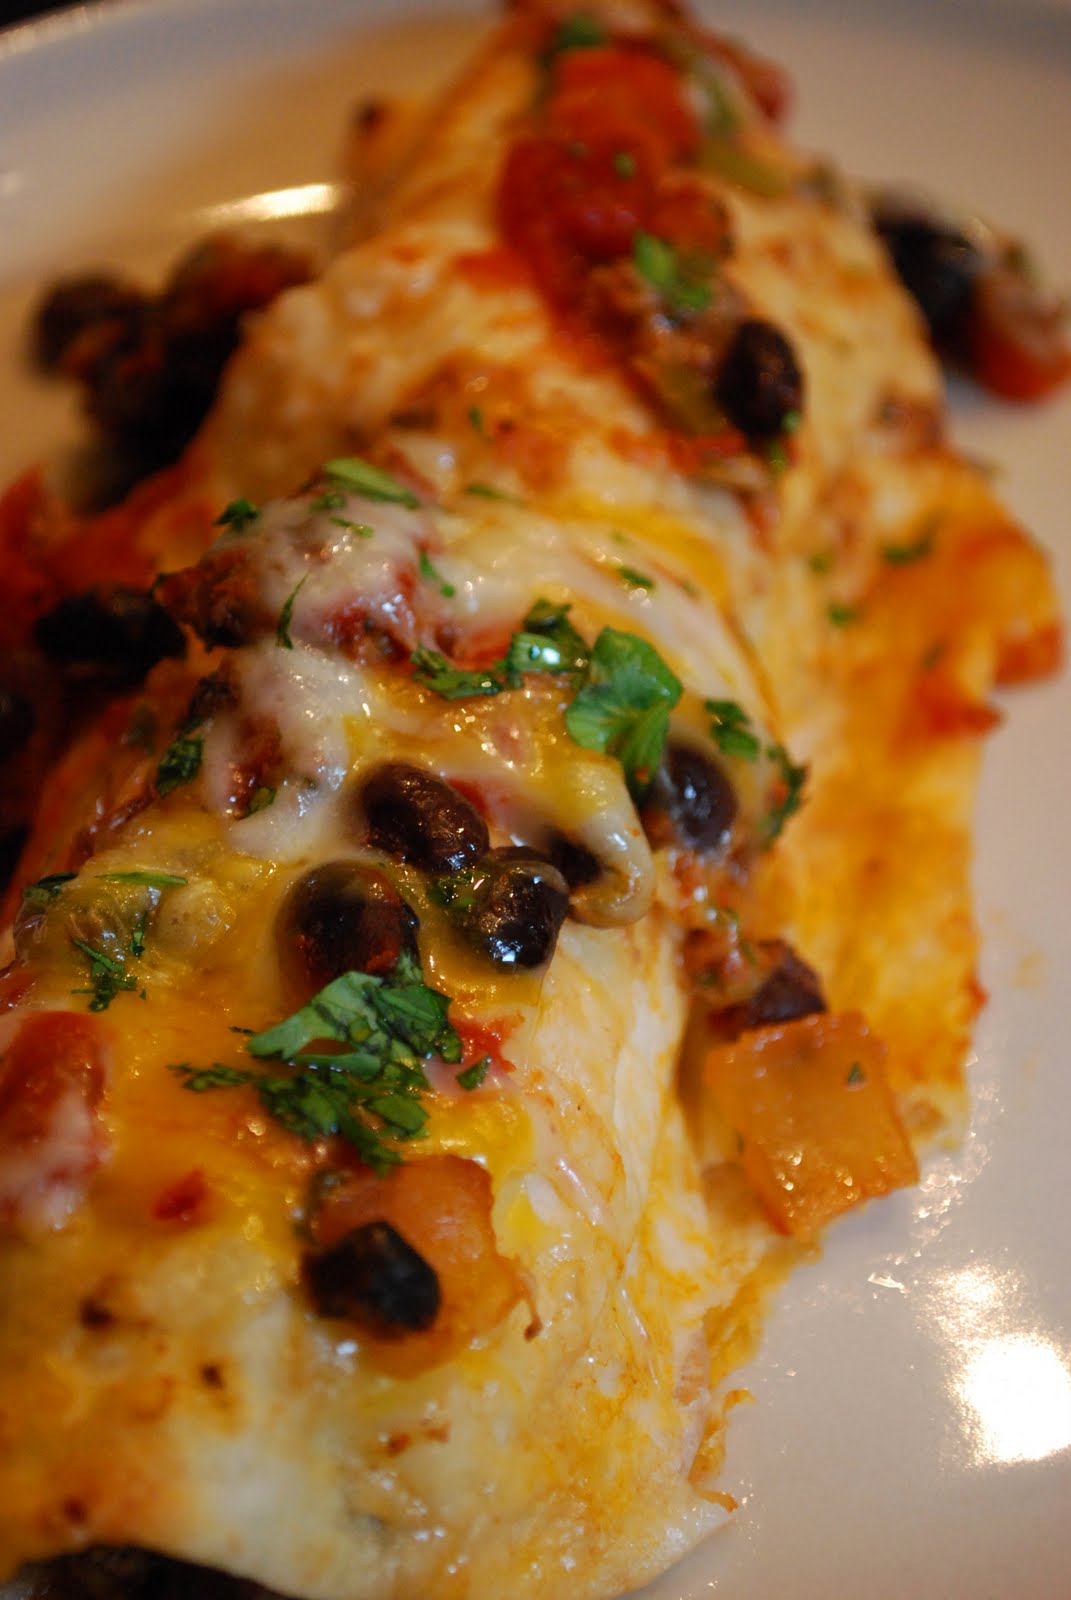
Beef Enchiladas

1 lb extra lean, grass-fed organic ground beef
1 cup chopped green peppers
1 cup chopped red peppers
1-2 jalapeno peppers, seeded if desired, chopped
1/2 - 1 tsp salt
2 cups tomato salsa
1 (19 fl oz/540 mL) can black beans, drained
1/2 cup old Cheddar
1/2 cup Mozzarella
2 tbsp olive oil
1 cup finely chopped fresh cilantro
8 - 10 flour tortillas, about 7 inches in diameter

Preheat oven to 400 F.
Heat a large skillet to medium, add beef, all peppers and salt to taste. Cook until meat has browned. Add 1 cup salsa and the drained beans; simmer 3 - 4 minutes. Remove from heat and stir in 1/4 cup cheddar, 1/4 cup mozzarella and all but 3 tablespoons of the chopped cilantro.
Spread 1/4 cup of salsa onto the bottom of a 9 x 13 glass baking dish.
Using a pastry brush, lightly coat each tortilla with olive oil, stack on a plate, then cover with a dish towel and microwave about 25 seconds, or until just warm.
Immediately spoon 1/2 cup meat and bean filling down the center of each tortilla, roll up tightly and place in the prepared baking dish, seam side down. Repeat to fill all tortillas, laying them single file. If you have extra filling, spoon this on top of the tortillas with the remaining 3/4 cup salsa.
Cover with aluminum foil.
Bake covered for 20 minutes.
Remove foil, sprinkle with remaining cheeses and bake additional 2 - 3 minutes.
Top with 2 -3 tbsp chopped cilantro and serve immediately.


Wednesday, June 16, 2010

Coincidence?!


The Soccer World Cup is in full swing as I write today, so perhaps an Italian flag should be replaced by a German one... I feel an apology coming on as I am terribly sorry to my German heritage, but when it comes to food, the Italians do take home the Gold. If you will notice the *coincidental* similarity of these two photos:


Do the Italians always have food on their minds?

Don't tell the authorities, but I think my passport is telling a lie! I am a typical Canadian, a Heinz 57 of many nationalities. (Of course my children are greater mutts than myself. But then, I have always been partial to mutts!) Still, I am convinced I should have been born somewhere between Italy and Spain. Although I would miss my blond hair.


And since you are wondering... No, I did not eat this much pasta in one sitting! This portion is for photography purposes only. (I did come close though... as this happened to be super yummy.)

I've had this dish buzzing around my head for a few days now. (Again, food on my mind at all times, very Italian-ish.) I am loving the fresh herbs in my garden, and I always stock Sundried Tomatoes in my pantry, as well as cream cheese - which is purchased in bulk and used in bulk. Garlic is never far off... and so I thought to myself, this must be a match made in Italy heaven. As I photographed the chopped herbs, tomatoes, and garlic, I couldn't help but think it looked an aweful lot like *a* flag. And so, a dish buzzing around in my head became a story buzzing even louder. A little like those horns at the World Cup.

Comparable to Spaghetti alla Carbonara, this pasta makes a great side to a crisp salad or fresh asparagus and grilled chicken. A good chef's knife comes in handy here - chopping the herbs, garlic and tomatoes finely is, I think, important for even flavour distribution. And don't forget to play with the ingredients - what's good for me may not be good for you. I happen to love a good amount of flavour... in other words use as much or as little herbs and tomatoes as you wish, it's sure to be tasty every time!


Asiago and Sundried Tomato Garden Spaghetti
Serves 4 - 6

3/4 - 1 lb Spaghetti
1/2 cup plain cream cheese (please don't use low fat)
2 - 3 tbsp olive oil
1/2 fresh basil, chopped (or a combination of basil and parsley)
1 (270 ml) jar Sundried Tomatoes packed in oil, drained and chopped
3 cloves Garlic, finely chopped
1 cup reserved pasta cooking water
fresh ground Pepper
Sea Salt
Asiago Cheese, a big chunk of it, for grating at the dinner table

Cook pasta in salted water to al dente, reserving 1 cup of the cooking water just before draining. Do not rinse pasta!!
In a large saucepan, combine cream cheese and olive with the garlic, herbs, tomatoes and fresh ground pepper over low heat until melted. Add the drained but not rinsed (!) spaghetti and reserved 1 cup pasta water. Stir to combine well. Season with salt to taste.
Serve with asiago cheese and a grater.


Friday, April 23, 2010

From then to now!


Isn't it incredible how the sense of taste brings with it a sense of memory? This, to me, is yet another reason why I adore food. In my late teens, I made cream cheese and bagels to pay rent. A minimum wage job, yes, but I never disliked being there. A standard kitchen aid mixer now looks funny to me - as I've worked with models 10x it's size when whipping up pounds and pounds of cheese.

Oh cheese, how you make my world go 'round! Be it expensive or common, I don't discriminate. There's a special little place in my heart (and tummy) reserved for stinky cheese, too. And one day, I just know it, I will love goat cheese, and possibly eat it every day!


We sold about 15 different flavours of cream cheese at the Cafe. Could be more, but certainly not any less. I'm actually quite curious how much I, on my own, ate (inhaled) while working there. It was free, after all, and I was a student, with bills. And still, I only have fond memories of Caramel Apple, Herb and Garlic, Sundried Tomato with Feta, and Roasted Red Pepper. Did you know you can stir just about anything into the creamy white stuff? So today when I saw my bulk amounts of cream cheese in the fridge (thank you Wegman's), I thought - surely I can remember what I did to create cream cheese heaven, oh, 12 years ago. It may not be exact, which is OK - we don't want to have any copy right issues anyway - but this Spinach and Feta Cheese was always my favourite. I think I did my memory justice.


Spinach and Feta Cream Cheese
1 brick or tub Cream Cheese (8oz or 226g)
2 green onions, finely chopped
1/2 cup crumbled feta
pinch of white pepper
1 cup frozen chopped spinach, thawed and squeezed as dry as possible
Combine well. Slice bagel. Spread on bagel. Close eyes. Mmmmmmmmmmmmm!

Monday, March 22, 2010

It's a family affair


I awoke this morning to the cheerful sounds of my children playing cheese store. Yup, that's right, cheese store. You see as parents we have such enormous influence on the lives of our children - they know we love them and blindly trust us to point them in not just the right direction, but the best. "From now on we should only buy cheese from Ontario!" Amongst many giggles, the girls turned socks into cheese (underwear being the stuffing!) and their bedrooms into a variety of necessary stations for successful cheese production. From production to packaging, and tasting to selling. It was music to my ears! What a way to start our day as a family. This journey has been an amazing one for me - and I love how it has spilled over onto the kids.


Visiting the Upper Canada Cheese company is the start to a Spring and Summer journey of discovery, one of enjoying the fruits of our home, the beautiful Niagara Region. There is bounty right at our doorstep, and I am honoured to call Canada, and specifically Niagara, my home.
It's taken me until just recently to feel this way. Until now I have simply viewed Canada as a place where I live, not one I am truly home at. Moving from to Canada from Germany just over 15 years ago has been a long and outstretched adjustment. I came to this realization of home in a much grander scale last week as I drove home from our country stay, not just because I ate Maple Syrup harvested only meters from where I slept, but also as I drove down the 401 from Trenton, our Highway of Heroes. I felt overwhelmingly thankful to the strangers who gave up their lives to ensure mine and that of my children. What an honour! As the sun beat through the car windows I took a moment to look at each and every poppy pictured to resemble our heroes. Had I not felt choked up, I may have burst out into Song.... Oh Canada!


Picture above is a Brie Baker made in Niagara-on-the-Lake, stamped with the Upper Canada Cheese company logo. An heirloom in the making?

Please visit:
http://www.uppercanadacheesecompany.com/

Their Comfort Cream is a Camembert style cheese which just won #2 cheese in Canada!

Wednesday, March 10, 2010

The Muffin that thinks it's a Cupcake

Okay, so I am not going to pretend that muffins are the latest health-craze, since in essence, the really are just a glorified cupcake. However, what you put into them is what separates them from dessert to perhaps breakfast, or an after school snack. People, and children specifically, eat with their eyes first. And why not? Food can be stunningly eye-catching, or utterly drab.

I love the art of food presentation. I could not draw a beautiful picture if my life depended on it, but I have noticed that no matter how simple food is, if I make it three dimensional, balance the colors and vary the textures, it becomes a work of art. One which never lasts more than a few minutes on it's canvas, the plate, but on the other hand one I have the privilege of creating a minimum of three times a day.

And so I want to share with you my absolutely favourite Banana Muffin recipe - I strongly believe our best recipes should be shared, not hidden. They need to be passed on from one person to the next, otherwise we will turn into a generation of people that eat their best food at restaurants. Oh wait, I think that has already happened! Let's celebrate home cooking, let's reignite the passion, and let's enjoy the after-effects of how it brings family together. This is something the Italian culture exemplifies quite well, as they have kept the tradition of uniting over food alive.
Change this recipe to your liking - you may chose to use one cup whole wheat flour to replace a white. Perhaps a few tablespoons of ground flax seeds can round out the nutrition, that, aside from the sugar, this muffin does deliver. Try toasted sunflower seeds instead of praline peanuts. Just remember - dress it up nice and you'll be eating with a smile on your face.

Sweet Banana Muffins with Cream Cheese Frosting
Makes 12 large
1/2 cup unsalted butter, gently softened
3/4 cup brown sugar
2 eggs, beaten
2 1/3 cups overripe bananas, mashed, about 3 bananas - the riper the better -
2 cups flour
1 tsp baking soda
1/4 tsp salt
Preheat the oven to 350 F. Prepare a muffin tin; either grease it or line with paper.
In a large bowl, cream softened butter with brown sugar until light and fluffy.
Gently beat the eggs and add to the sugar.
Mash the bananas thoroughly and add as well. Combine well.
Place your flour, baking soda and salt on top of the sugar base. Using a fork, stir the baking soda and salt into the flour.
Now stir the whole thing up, but don't over mix, just until everything is incorporated or you will be eating hockey pucks, not soft muffins.
Divide evenly in the prepared muffin tin.
Gently tap the filled muffin pan on the counter to release air bubbles and to distribute the batter evenly.
Bake for 20 - 25 minutes, until tops are golden but not dark.
Cool 10 minutes in the pan.
Remove and cool completely on a rack before icing.
Best Ever Cream Cheese Frosting
1 (8oz) pkg cream cheese, softened but not melted
1/4 butter, softened but not melted
1 cup icing sugar
1/2 tsp real vanilla extract
Beat the cream cheese and butter together with a small whisk. Add icing sugar and vanilla.
Continue beating until all clumps are gone.
When the muffins are cooled, pipe un-chilled frosting in a circular motion onto the tops.
Crush a handful of praline nuts in a small zip top bag, using a rolling pin. Do not smash these, but with pressure roll over to crush into smaller pieces.
Sprinkle the frosting with the nuts.


Wednesday, February 3, 2010

Creamy goodness in a bowl.


Risotto. If there something I love about the Italians, it is Risotto. I have made all sorts of these and seem to fall more and more in love with them! This Squash version is inspired by eatingwell.com - it delivers plenty of vitamins A and C along side it's stunning fall flavors. And even though we are headed for spring (what a nice thing to be able to say), I could eat squash in any season. The earthy mushrooms with the creamy rice bring comfort but I think they deliver it in style. Risotto, in my opinion, is simple to prepare and there's no reason to be daunted. After a few tries, I have discovered the right texture for it: lightly al dente, but not crunchy, and creamy but not gluey. Serve with a crisp white wine like a pinot grigio, and you've got yourself a nice meal!

The white wine in this risotto *could be* optional, but, I think it is that little extra something which brings it over the top. I have made it with and without, either way, the risotto received a standing "mmmmmmmmmm"!


Creamy Squash Risotto
Serves 4
5 cups reduced sodium chicken or vegetable broth (if you don't have reduced sodium, use 3 cups broth and 2 cups water)
2 tbsp olive oil
3 medium shallots, minced
3 cups peeled butternut squash, 1 cm pieces
2 cups shitake mushrooms (caps only, so buy more than 2 cups), sliced about 1/4 cm thin
1/2 tsp dried thyme
1/2 tsp salt
1/4 tsp black pepper
1 cup arborio rice
1/2 cup dry white wine
1/2 cup finely grated Parmigiano-Reggiano cheese


Heat the broth in a saucepan, over medium high heat. Reduce the heat to keep the broth warm but not simmering.

Heat the olive oil in a wide, deep skillet. Add the shallots; cook, stirring, for about 1 minute. Stir in the squash and mushrooms; cook, stirring, for 5 minutes.

Add the thyme, salt and pepper, cook for 30 seconds.

Add the rice; stir until translucent, about 1 minute.

Add the wine and cook, stirring until almost absorbed by the rice, about 1 minute.

Stir in 1/2 cup of the hot broth at a time, cooking over gentle heat (just over low heat), stirring constantly, until all the liquid has been absorbed. Continue adding 1/2 cup of broth at time, stirring at all times, until all the liquid has been absorbed, and the rice is creamy and tender. This will take about 30 - 40 minutes. You may have broth left, or you may run out - if so, use hot water to finish it off.

Remove from heat and stir in the cheese.


Monday, January 25, 2010

Mom, this dinner is SO good, we forgot to pray!


Lalalala! Music to a mama's ears.
Lately I've been trying out appetizers, and using them as entrees, since there simply aren't enough parties in a year I would ever need them for. I absolutely adore appetizers and I would like to learn to prepare an abundance of these... Sunday lunch consisted of Tomato Bruscetta (I finally found my go-to recipe) and Spinach Artichoke Dip with crackers. Today I made Gnudi. I had planned these for a dinner with friends, which unfortunately ended up being canceled, but my pantry was now prepared to make a stunning starter! Instead of attempting it the first time for visitors, I made them for a family dinner. Which I am really, really happy about. The salad I had planned for my visitors I made a few days prior to tonight, and am now ever so grateful we decided to postpone, as the salad was a total flop. I am finally fully convinced we should only prepare what we know for our guests. Forget the guinea pig thing, I have made a decision to leave that job title to my family. I have no intention to ever make that salad again, but these Gnudi were, in the end, quite stunning in texture and flavor, although I didn't figure out the proper technique until the very end. But, now I KNOW and am ready for some entertaining. I served the Gnudi with one of my favorite new-to-us meats - pork tenderloin - with caramelized red onions plus a quick Caesar salad.

Try these, I am sure you will love them, too. Shape the Gnudi by using two soup spoons: scoop a dollop of batter from spoon to spoon until you have an even looking dumpling, about 3 or 4 times.


Ricotta Gnudi with Brown Butter

Serves 6

3 eggs
(1) 425g tub Ricotta cheese
3/4 cup flour
1/2 cup freshly grated Parmesan cheese
1 tsp salt
6 tbsp butter

In a large bowl, whisk eggs until frothy. Add ricotta, then flour, Parmesan and salt. Combine thoroughly. Chill batter in the fridge for 15 minutes.
Meanwhile, bring a large pot of salted water to a simmer. Using two soup spoons, form about a scallop size amount of dough into a rough ball. Drop into the simmering water. Form about 8 Gnudi, and allow to simmer for about 3 minutes. Using a slotted spoon, remove them from the water and place on a large plate. Drop another 8 Gnudi into the pot. Repeat until all the batter has been used up.
Melt the butter in a large saute pan over medium heat. Cook for about 5 minutes or until butter has browned.
Add Gnudi. Cook for 5 minutes, tossing or gently flipping them in the pan until heated through.
Plate and garnish with additional Parmesan and black pepper, if desired.

Monday, January 11, 2010

Finocchio al Forno

My husband and I can get into mini battles of the words over vegetables vs. meat. I think, secretly, he is scared I will turn our family into a plant eating, meat substituting kind of family. His fears are not without validation, as I have spent a few years of my life without animal products, and could do it again in a heart beat. The look on his face as I attempt to reassure a meaty future is not overly convincing, so I am going to put it out there for the world to read - a written guarantee of steak, barbecue chicken, and even sausages - however never without an accompanying vegetable! (I did win a little portion of this argument though, listen up all you who need to convince your other halves to finish the 'green stuffs' on their plates: We could live on vegetables and grains alone, and be super healthy, but give us meat only, we may lose a few pounds, sure, but we probably will suffer some sort of heart failure amongst many other organ problems.) So there you have it. It's all about balance - which seems to be the way my husband and I often conclude with agreeing to disagree.

If you are anything like me, which you probably aren't but bare with me, you may get kicks out of putting a new vegetable on the dinner table once in a while. If it wasn't for this, carrots and broccoli could easily be the end of it in my home, mostly because I seem to be the only advocate! I personally am still working on turnips and brussel sprouts, but am excited to discover how wonderful they are when roasted in small bite sizes along with a medley of other options (thanks, Aunt Jean!). This past weekend I bought fennel. Mmm fennel. It's something I ate once in a while growing up in Europe, and fennel tea is what toddlers drink instead of juice over there. Fennel is quite mild in flavor and texture, which really does make it an ideal option for kids. It has a natural sweetness to it as well, with a slight licorice taste - what's not to love? And to top it off, fennel also aids digestion, which can be helpful for so many of us grown ups.

Finocchio al Forno (Caramelized Fennel)
serves 4

2 large fennel bulbs
6 tbsp (90 ml) extra-virgin olive oil
1/2 cup freshly grated Parmigiano-Reggiano cheese
Salt and pepper, to taste
1/2 cup dry bread crumbs

Rinse the fennel. Cut off and discard the long stalks.
Cut the bulbs into eighths.
Preheat oven to 450 F (230 C).
Drop the fennel into a pot of boiling salted water and cook for about 5 minutes or until just fork tender. (This simply gives it a head start to cut down on roasting time.) Drain and dry completely with a clean kitchen towel.
Spread in a roasting pan and drizzle with olive oil (don't be shy now!), then top with grated Parmigiano, salt and pepper, then bread crumbs.
Roast in the preheated oven for about 30 minutes, until caramelized and a nice golden color.

Wednesday, December 23, 2009

My very own Lasagna


Okay folks, here it is... a recipe I made 100% from scratch and without any inspiration from any source, using some of the knowledge of food I have gained over the last few months. I do cook without a recipe quite often, but this one is worth publishing, I think, even though perhaps it is nothing spectacular and I am sure that somewhere out there, someone has made this probably much better than I. I did, however, get the stamp of approval from my family on this one, and I am pretty sure we will be making this a staple.
What I have made is what I call a Bacon Chili Bean Lasagna. It feeds 6 - 8 for under $10 and pairs quite nicely with either a Caesar Salad, or torn leaf lettuce with Balsamic Vinaigrette. This Lasagna is not like some other Mexican inspired tortilla shell casseroles, but takes on more of a southern flavour, one of home made refried beans with a variety of textures and flavours that do not get lost in putting it all together. Sweet corn contradicts salty bacon, chewy cheese balances the starchy beans, fresh parsley cuts the heat of the chili. All this in a fresh tomato base. I am happy with the result.

Bacon Chili Bean Lasagna
Serves 6 - 8

8 slices Bacon, small dice
1 medium or two small Onions, small dice
2 Carrots, medium dice
1 Celery stalk, medium dice
2 cloves Garlic, crushed
3 tbsp Tomato Paste
3 medium ripe Tomatoes, medium dice (skin on)
1 cup Tomato Puree
1 - 2 tbsp Chili Powder, according to personal taste
1/2 chicken bouillon cube
1/2 - 1 tsp Salt, according to taste
1/2 tsp Black Pepper
1 tsp dried Oregano
1 can Black Beans, 540mL, drained
1 can Red Kidney Beans, 540mL, drained
1 cup frozen Peaches and Cream Corn Kernels
9 Lasagna Noodles
1 cup shredded Marble Cheddar Cheese
about 1/4 cup roughly chopped flat leaf Parsley


Saute bacon in a large saute pan over high heat until crisp. Remove bacon, lower heat to med-low. Add onions, carrots and celery, sweat in the bacon fat without browning until soft.
Add tomatoes, tomato paste and tomato puree, plus a pinch of salt to release water in the tomatoes, garlic, chili powder, bouillon cube, oregano and black pepper.
Simmer on med-low until it has been reduced to puree consistency, about 10 minutes, stirring occasionally.
Meanwhile, cook lasagna noodles according to package directions. (Do not use no cook noodles.)
Preheat oven to 375F.
Use a potato masher to gently smash beans. You want to release the starch, but avoid loosing all shape and form of the beans.
Add the reserved bacon and the corn (no need to cook it). Heat to warm throughout. Adjust seasoning to taste with salt, pepper and chili powder.
Place about 1/4 of the bean mixture on the bottom of a 9 x 13 inch baking pan. Top with three noodles, then layer: 1/4 of the bean mixture, 1/2 of the cheese, 3 noodles, 1/4 bean mixture, 3 noodles and the remaining bean mixture.
Cover the baking pan with tin foil.
Bake in the preheated oven for 20 minutes.
Remove the foil, sprinkle with remaining 1/2 cup cheese and parsley. Bake for another 5 minutes, or until cheese is melted.
Allow to rest for 10 minutes before serving.